Updated on February 12, 2025
In this post, we will be discussing a step-by-step guide to deploy a chatbot in Moodle websites. Moodle is the world’s most widely used Learning Management System (LMS) designed to provide educators, administrators, and learners with a single robust, secure and integrated system to create personalized learning environments.

Some features of Moodle
- It is open-source
- Easy to use interface
- Support multiple languages
- Convenient file management
- Use any time on any device
Nowadays, AI is finding its way into everything. Universities, schools, ed-tech platforms, and other educational organizations rely on conversational AI and educational chatbots more than ever. Hence, organizations using Moodle must start thinking about the same.
Need for the Moodle chatbot
- Chatbots can help answer FAQs
- Moodle chatbots can keep users engaged to complete online courses
- They can assist students seeking clarifications around their course curriculum
- Help collaborate data in one place
- Make the work of faculty, staff, and service team easier
Now that we have seen that chatbots are helpful for any Learning Management System. Let’s now see how we can add a chatbot to Moodle websites.
You can create a Moodle chatbot in 2 phases:
- Choose a chatbots platform or build your own. In this example, we will be using a Kompose chatbot and setup the answers
- Add the created chatbot to your Moodle site
Let’s jump right into it.
Phase 1: Create a Kompose chatbot and setup the answers
Step 1: Setup an account in Kommunicate
If you do not have an account in Kommunicate, you can create one here for free.
Next, log in to your Kommunicate dashboard and navigate to the Bot Integration section. Locate the Kompose section and click on Integrate Bot.
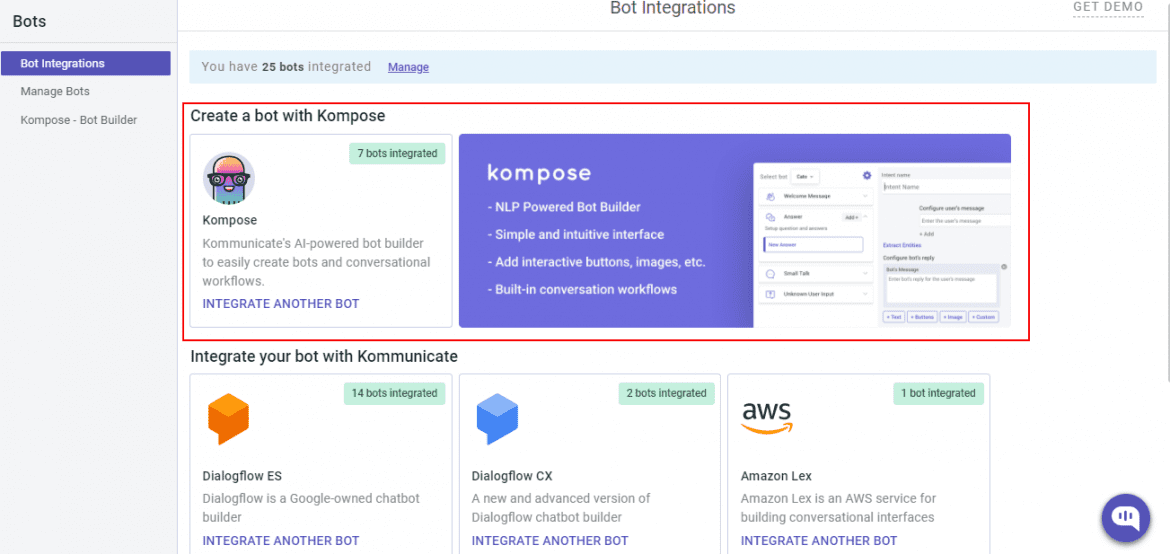
Start Building Your AI Chatbot Without sign upNow, set up your bot by providing bot name, bot language, human handoff setting, and finish the bot setup.
You can check your newly created bot here: Dashboard →Bot Integration → Manage Bots.
Step 2: Create welcome messages & answers for your Moodle chatbot
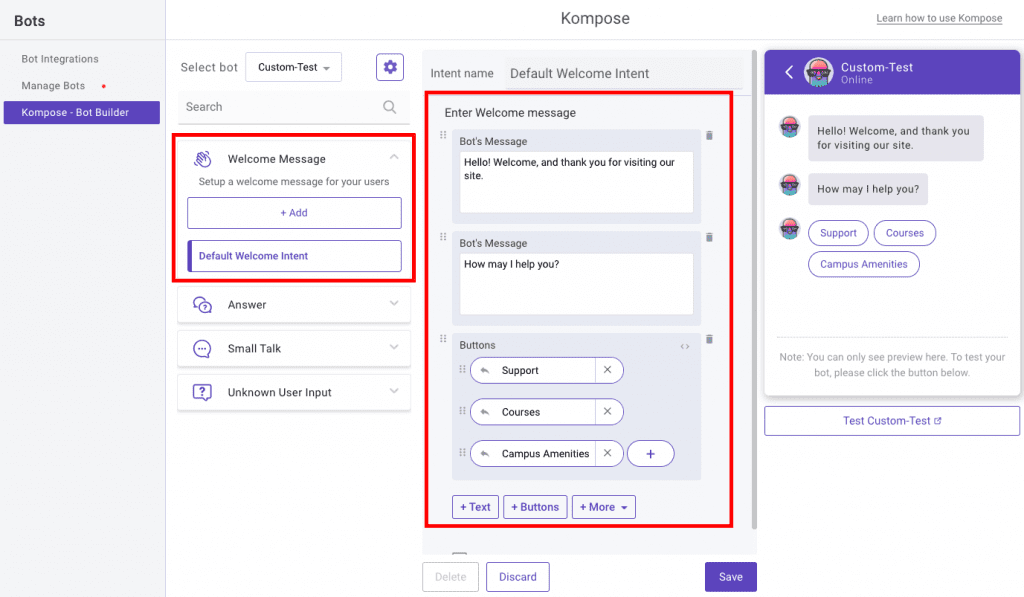
Go to the ‘Kompose – Bot Builder’ section and select the bot you created.
First, set the welcome message for your chatbot. The welcome message is the first message that the chatbot sends to the user who initiates a chat.
Click the “Welcome Message” section. In the “Enter Welcome message – Bot’s Message” box, provide the message your chatbot should be shown to the users when they open the chat and then save the welcome intent.
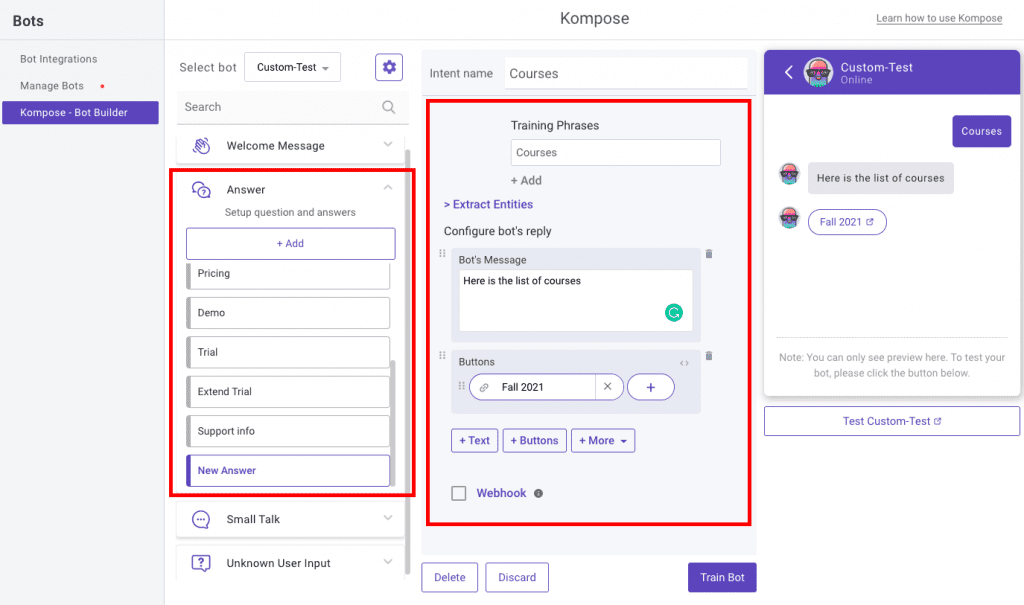
After creating the welcome message, the next step is to feed answers/intents. These answers/intents can be the common questions about your product and service.
The answers section is where you’ve to add all the user’s messages and the chatbot responses.
Go to the “Answer” section, click +Add, then give an ‘Intent name’
In the Configure user’s message section – you need to mention the phrases that you expect from the users that will trigger.
Configure bot’s reply section – you need to mention the responses (Text or as Rich messages) the chatbot will deliver to the users for the particular message. You can add any number of answers and follow-up responses for the chatbot.
You can also refer to this blog for Kompose chatbot integration with Kommunicate.
 Bonus Video: Create a Chat Bot in 5 Minutes
Step 3: How to activate the chatbot
Once you create a bot, you can set it as a default bot in the conversation routing rules section below.
Click on  Settings >> Conversation rules >> Routing rules for bots >> Then select your chatbot from the dropdown
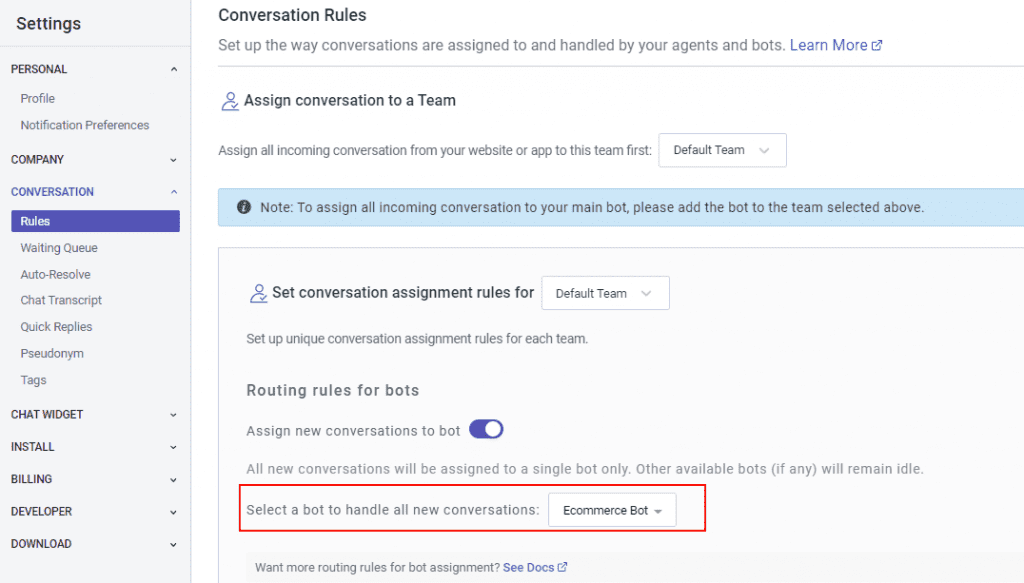
Now, this bot will reply to all the incoming messages.
Phase 2: Add the Chatbot to your Moodle site
Step 4: Log in to your Moodle account
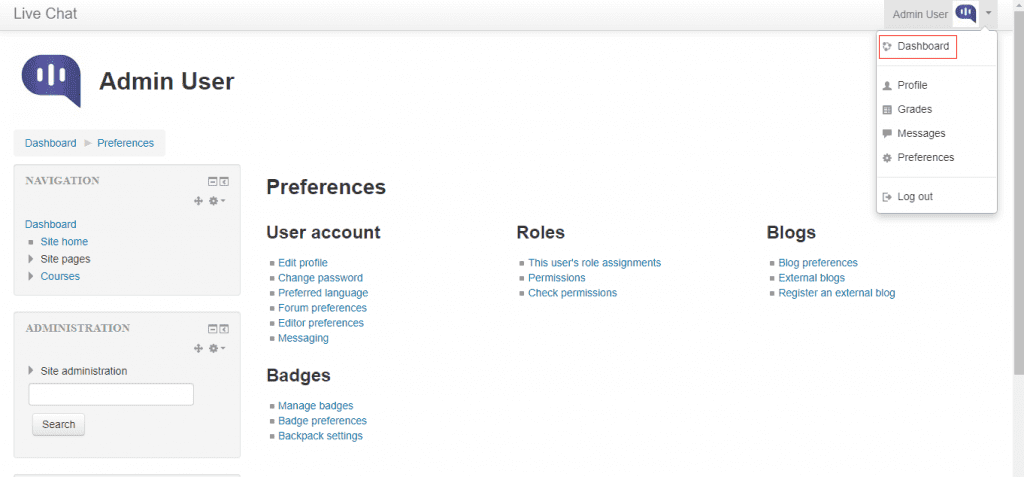
Once you logged in, it will show the preference sections. Click the ‘Admin User’ dropdown and click the Dashboard option.
Step 5: Add the Kommunicate Live Chat Script
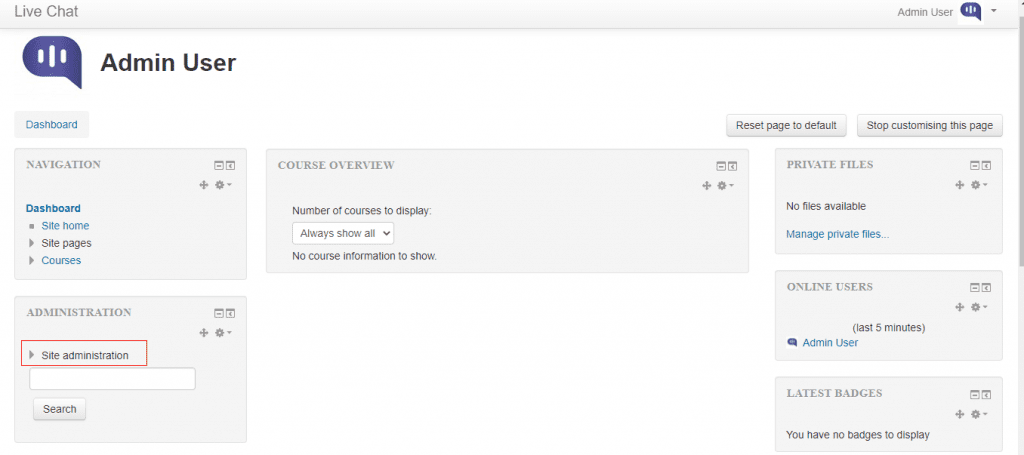
From the left navigation panel, click on the “Site administration” option.
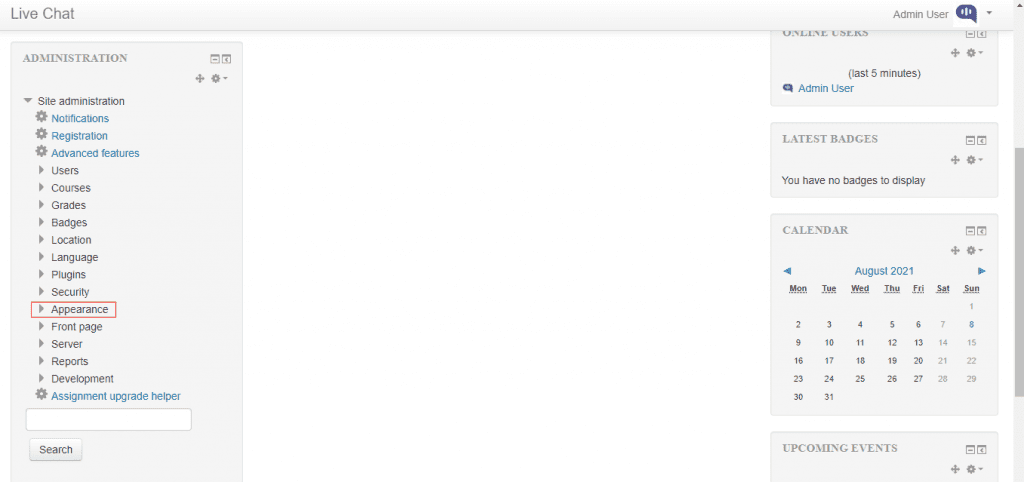
Under the “Advanced features” section, click on the “Appearance” option.
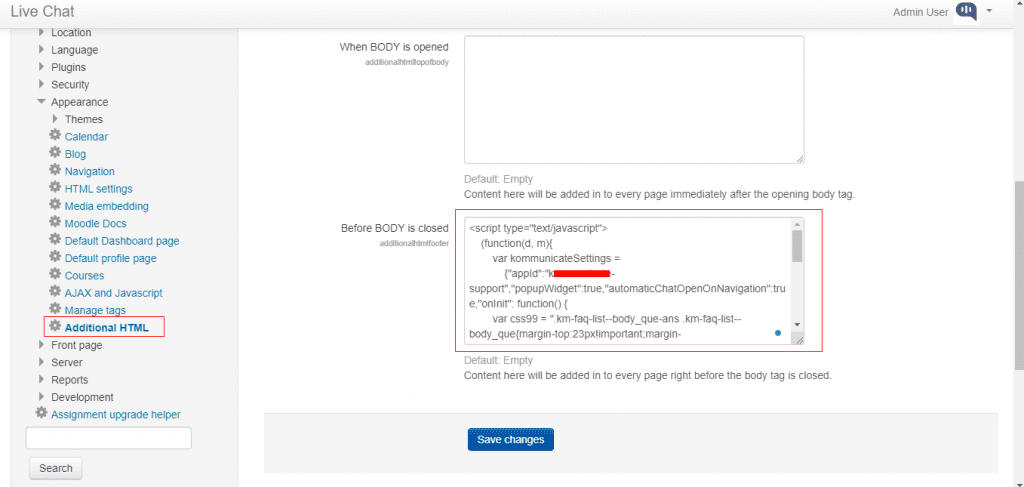
Now click and open the “Additional HTML” section. Copy your Kommunicate live chat script from the Kommunicate dashboard -> Settings -> Install. Insert the copied script in the “Before BODY is closed” box and “Save changes”.
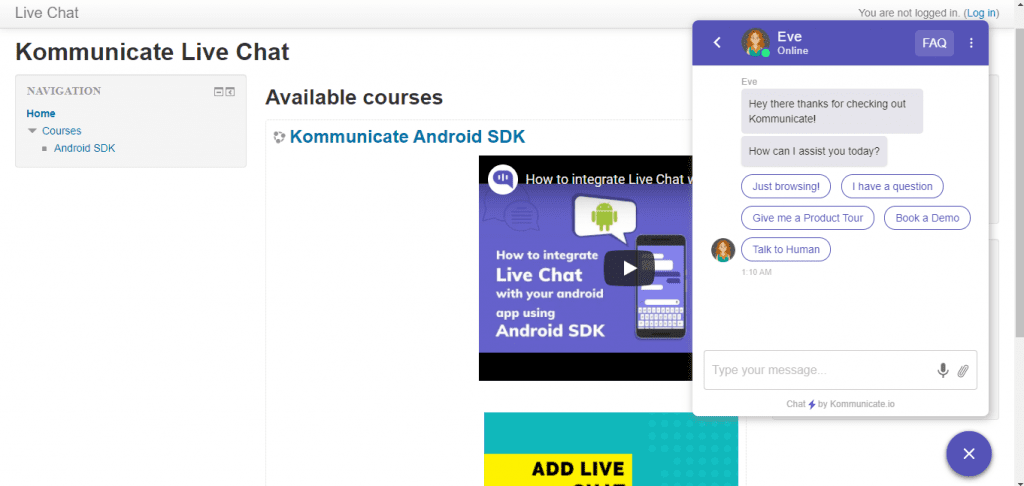
Open your Moodle website and you will see the Kommunicate chat widget will be loaded along with the bot responses. You can manage the conversations from the Kommunicate dashboard.
Building your Moodle chatbot and installing is very simple and requires no coding skills or technical expertise.
Reduce response time, enhance support workflows, and improve customer satisfaction with AI-driven email ticketing from Kommunicate!